


Introduction
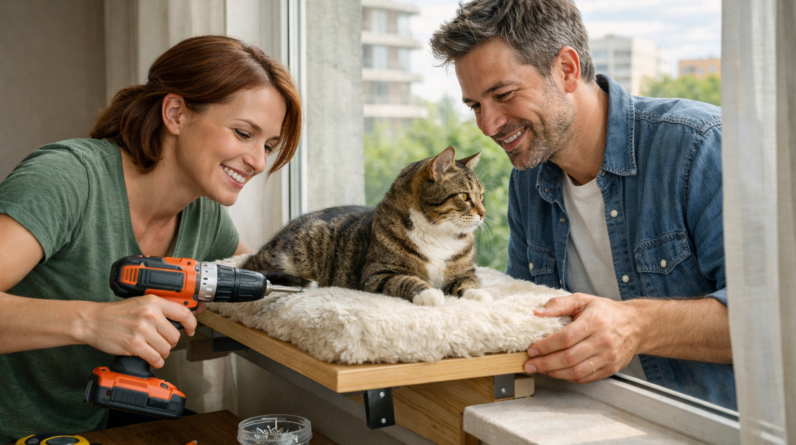
If you have a cat, you’ve seen the longing stare: that fixed gaze out the window, tracking birds, feeling the sun’s warmth, and yearning for a prime viewing spot. Store-bought cat window perch options can be wobbly, overpriced, or simply not the right size. The solution? A custom, sturdy cat window perch you can build yourself. This perfect catification project is not only affordable but also remarkably simple. With just a few common materials and basic tools, you can create a beloved feline haven in just one afternoon. Let’s dive into how to build a cat window perch that is safe, secure, and tailored to your space.
Why Build a DIY Cat Window Perch?
This project is more than just a shelf; it’s a cornerstone of indoor cat enrichment. Catification—the art of adapting your home to your cat’s needs—strengthens your bond and prevents behavioral issues.
Benefits for Your Cat
A window bed for cats provides a safe vantage point, satisfying their instinct to survey their territory. It offers mental stimulation, a warm cat sunning perch, and a sense of security, all of which contribute to a calmer, happier pet.
Benefits for You
Beyond the joy of a contented cat, this easy DIY cat project saves significant money compared to store-bought versions. You control the size, finish, and stability, ensuring it fits your window and decor perfectly. Best of all, no advanced skills are required—this is a truly beginner-friendly foray into DIY cat furniture.
Materials and Tools Needed
Gathering everything first is the key to a smooth project. Here’s your shopping and prep list.
| Materials | Tools |
|---|---|
| 1×12 or 1×10 pine board (length tailored to your window) | Power drill & drill bits |
| 2x Heavy-duty L-brackets (minimum 6-inch) | Screwdriver (or drill driver bits) |
| 2.5″ Wood screws (for studs) | Stud finder |
| 1″ Wood screws (for brackets to board) | Measuring tape |
| Wood glue (optional for extra strength) | Level |
| Sandpaper (120-grit & 220-grit) | Pencil |
| Non-slip mat, cushion, or small rug | Safety glasses |
| Optional: Pet-safe stain, paint, or sealant |
Pro Tip: Many hardware stores will cut your wood to length for free or a small fee—ask! For finishes, ensure any stain, paint, or sealant is non-toxic and fully cured before your cat uses the perch.
Step-by-Step Building Instructions
1. Planning and Measuring
Measure the width of your window trim or desired mounting area. Your perch should be long enough to be useful but not obtrusive. A good length is 18-24 inches. Decide on a depth; 10-12 inches gives most cats ample room to lounge. Mark these dimensions on your wood board.
2. Cutting and Sanding
If you didn’t get a pre-cut piece, carefully cut your board to size. Now, sand thoroughly! Start with 120-grit sandpaper to smooth any rough edges, then move to 220-grit for a silky finish. Round over the corners slightly for a more polished look and safety. This step is crucial for creating a wooden cat window perch that’s pleasant to the touch.
3. Attaching the Support Brackets
Flip the board upside down on a flat surface. Position an L-bracket about 4-6 inches from each end. Ensure the brackets are straight and parallel. Mark the screw holes, pre-drill small pilot holes to prevent wood splitting, and then secure the brackets to the board using the 1″ wood screws. For added strength, a dab of wood glue in the joint before screwing is a great idea.
4. Mounting the Perch to the Wall
This is the most critical step for safety. You must mount into wall studs. Use your stud finder to locate two studs within your desired perch placement. Hold the perch (with brackets attached) level against the wall, marking the bracket screw holes onto the wall. Pre-drill into the studs at these marks. With a helper holding the perch perfectly level, drive the long 2.5″ screws through the brackets and into the wall studs. Tighten firmly. A wall-mounted cat perch in studs can hold 50+ pounds easily.
5. Adding Comfort and Safety
Once the structure is secure, add comfort. Place a non-slip mat, a small folded blanket, or a pre-made cushion on the platform. You can use velcro strips or double-sided tape underneath to keep it from sliding off. This creates a cozy cat window seat your pet will love.
Customization and Catification Ideas
Your basic DIY cat perch is functional, but why stop there? Here are some catification ideas to level it up:
- Add a Bolster: Glue and staple a foam pool noodle or rolled towel along the front edge, then cover it with machine-washable fabric for a cozy bumper.
- Create a Mini Lounge: Use a piece of inexpensive faux sheepskin for ultimate luxury.
- Integrate Play: Screw a small eye-hook into the underside of the perch to hang a dangly toy.
- Build a Ladder: Connect your cat window shelf to a nearby cat tree or set of wall shelves to create a full catification highway.
Safety Check and Cat Introduction
Final Safety Inspection
Before the grand opening, give the perch a rigorous test. Put your full body weight on it, pushing down and applying slight upward pressure. Check that all screws are tight and the board doesn’t flex or shift. This ensures it’s a sturdy cat window perch ready for years of use.
How to Encourage Your Cat to Use It
Cats can be suspicious of new things. Lure them with their favorite treats or catnip sprinkled on the perch. Place a familiar blanket or toy on it. Sometimes, simply placing them gently on it a few times does the trick. Be patient—once they discover the view, it will become their throne.
Frequently Asked Questions (FAQ)
| Question | Answer |
|---|---|
| What weight can this perch hold? | When mounted into two wall studs with proper screws, this design can easily hold 50+ pounds, making it safe for even the largest cats. |
| Can I install this in a rental/apartment? | Yes, but you will need to patch screw holes upon moving. For a true DIY cat perch no drill alternative, consider using heavy-duty suction cup shelves designed for showers, but always test weight limits carefully. |
| What if my cat ignores the perch at first? | Don’t despair. Ensure it’s in a sunny, appealing location. Use consistent positive reinforcement with treats. Sometimes, moving a nearby cat tree or chair to block alternative spots encourages them to try the new space. |
| How do I clean the perch? | Vacuum or shake off the cushion regularly. If you used a removable cover, wash it according to its instructions. Wipe down the wooden platform with a damp cloth and a mild, pet-safe cleaner. |
Conclusion
Building a DIY window perch for cats is a rewarding catification project that benefits both you and your feline friend. In just one afternoon, you can provide a source of joy, stimulation, and comfort for your cat, all while enjoying the pride of creating something with your own hands. Grab your tools, follow these cat window perch plans, and get ready to enjoy the sight of your cat blissfully basking in their new favorite spot—the one you built just for them.
We’d love to see your creations! Share photos of your custom DIY perch or ask questions in the comments below.